Thursday, December 16, 2010

Lesson 1.03 - Panels

Panels

Alright now I know you people might be wondering that this dude is not getting to the point that we all want, Editing ! He is on and on blabbering about the interface and work area and this is getting boring. Frankly speaking even I am getting bored :P but trust me people, you cannot work without knowing the interface and work area well and that is why I am focusing just a little too much on this so please bare me :P

Now we are going to learn about Panels.

Many of Photoshop's commands and tools are available in the panels that you see on the right hand side of the window.

The default panels in Photoshop CS4

These panels can get very handy at times when you need them but can get real cocky when you dont :P
So Photoshop allows you to choose the ones you want and dump the ones you dont as well as choose the ones you want to show up and hide the ones you dont temporarily :)

The above image is the default panel set up for Photoshop. As you see the panels are arranged in groups and each group has different tabs. Take for example the first group, this is the Color panel. Each panel has a certain name or label assigned to it. Now in the color panel we have three different tabs like Color, Swatches and Style like you can see in the image below.

The Color panel

Now the uses of each element will be taught later. For now lets take for example you dont want this particular Color panel or you just dont want a particular tab in the Color panel. What you do is go to the top right small icon in the panel, this is called the Panel Menu icon.

The Panel Menu icon

When you click on that, you get a drop down menu with a couple of settings and other components that is related with the current Color Panel.We wont need to know the different components for now because we will do that in the later lessons. Now way at the bottom, you will find two options, Close & Close Tab Group. The Close option will remove just the selected tab from the group, for example if the Styles tab in the Color panel was selected while you clicked on the Panel Menu, then the Styles tab would be removed from the panel & if you choose the Close Tab Group, the entire color panel will be removed from the workspace.

The Panel Menu


Now just incase you want a particular panel that you removed or is not there from the default, then you can just go to Window from the menu bar and choose the desired panel you would wish to keep.

Thats all about the panels :)

Have a nice day !

Tuesday, December 14, 2010

Sorry !

I convey my heartfelt apology to all my viewers for the delay in the next lesson. My desktop monitor had crashed down for 2 days and I just bought a new one and you have my word that tomorrow you will get your next lesson.

Sorry once again

Have a nice day  :)

Thursday, December 9, 2010

Lesson 1.02 - Video


Tools

Lesson 1.02 - Tools

Single & Double Column Tool Box

The Photoshop tools can be found in the tool box on the left side of the window on a single column.

The single column tool box
Now just incase you want double columns, all you do is click on the double pointed arrow on the top of the toolbox.

The double column tool box
Now my personal opinion is I would go with single column so that I get more space to work with my image. :)

Alright, now you may be wondering, thats it?? these are all that Photoshop got as tools?? Then your wrong! 

Additional Hidden Tools 

First of all, each an every tool in Photoshop is way more powerful than you can ever imagine. Secondly, in the tool box you might have noticed this small arrow on the bottom right of certain tools such as Eraser Tool, Clone Stamp Tool etc. This is a drop down menu for more in tools in that particular category. For example, 

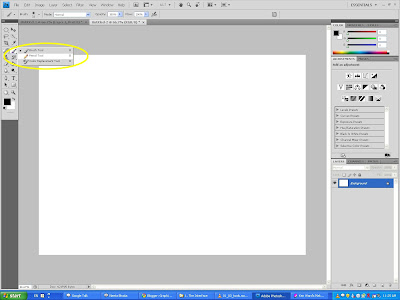
The drop down tools for Brush Tool
Of course in order to start using a tool you have to select them. Now one way is by clicking on the desired tool from the toolbox or simply by using keyboard shortcuts. You might be wondering that by the time you are gonna start memorizing all the shortcut keys, you will start having white hair ! :P Dont worry! When you drag your cursor to any of the tools and wait for a moment and you will get a notification with the name of the tool and the keyboard shortcut for that tool. Easy isn't it ? ! :) 

Tool Options Reset

Now when you choose a tool always dont forget to have a look at the tool options bar which gives you specific options for a particular tool for a more efficient result. Different tools have different tool options.

The Tool Options Bar

Now the most important thing about the tool options bar is that you should remember how to reset them back to default because at times the values or specifications get a lot messed up and you intend to forget the original. But dont worry! Its pretty simple. Whenever you select a tool, on the tool options bar the first icon on the left is the tool itself that you chose. Now right click on the arrow and you get two options, Reset Tool & Reset All Tools. If you choose Reset Tool, it will reset the active tool's default settings & if you choose the later then it will reset the default settings for all the tools :) Pretty Easy HUH ;) It will look like this,

Reset Options
For now this is enough about the tools because if I just show you each and everything in one shot then you might get really confused. So I will teach you all the tools one by one later with context to what they can be useful for and thats the best way you will understand.

Hope I was clear enough.Any doubts please feel free to contact me :) 

Have a good day ! 


Wednesday, December 8, 2010

Lesson 1.01 - Video

This is video that is going to clear all your doubts about this lesson. P.S. the video is using MAC OS but dont worry its just the same and whenever the person gives out a shortcut key for MAC, alongside a WINDOWS shortcut key is also given out.


Tuesday, December 7, 2010

Lesson 1.01 - Tabbed Windows

Alright people, time for our next lesson. Today we are going to learn something that you should know well before we start dealing with Photoshop. It is about the windows in the workspace. From CS3 and backwards, all the versions, when two or more images where opened at one time, they appeared in separate windows & the negative point is that sometimes when a couple of documents are open, they get hidden behind each other making the workspace look like you never wana know whats happening in there which ultimately leads to you losing your temper and shutting down the pc ! :P Trust me it has happened to me (a)

This is how it looks like in CS3 or previous versions though  the image is take in CS4.
I just wanted to show you the difference :)

But, Adobe found a solution to this! Now not only you have all images in one window but multi-tabbed just like you see in your Google Chrome or Firefox browsers but you can even have the separate windows view :D 

This is the multi-tab feature from CS4 onwards.
In the multi tab view you can view your image by clicking on the image tab that you desire to view.

Now inorder to rearrange the order of the images in the tab since you have more than 2 images or so, you just click and drag the desired images to its desired location or the tab. It will become clear to you when you see the next video I upload so dont worry :) 

Now just incase you dont want all the images to be in the tab and you want one of them to be in a separate window, all you do is click and drag it outside the tab and you will get that image in a separate window :) 

Multi-Tab as well as separate window :)
Now just incase you want it back on to the tab, all you need to do it click and drag the window back to the multi tab area or if you have more than one or two images that you want to get back to one tab, you can go to Window>Arrange>Consolidate All to Tabs, just like shown below.

Window>Arrange>Consolidate All to Tabs
Photoshop even allows you to change the layouts of the tabs or windows on your workspace. All you got to do is click on the Arrange Documents icon on the menu bar and choose your desired layout.

The Icon for Arrange Documents
For example you choose the 3-up view
This will be you layout for 3-up
Thats all about Tabbed Windows and dont forget to check our the video about this lesson which I am going to upload.
Hope I was clear enough.

Have a nice day ! :) 

Monday, December 6, 2010

Lesson 1 - Video

Alright people before starting the second lesson I think you should first take a look at this video down here to have a rough look at what the Photoshop's Interface and workspaces look like. Its a brilliant tutorial with simple english and very easy to understand.Here you go ...


Adobe Photoshop CS4 1 - Interface & Workspaces

Saturday, December 4, 2010

Lesson 1 - Interface

Time for the first class I guess :)

First of all let me inform you that since there are a lot of Adobe Photoshop versions for example CS (Creative Suite), CS2, CS3, CS4 & CS5 etc. I have chosen the average version CS4. If you know CS4 then you know all of them just that in CS5 we have additional features which I wouldn't be going through since I don't want to confuse you all and that many people not necessarily might have the latest version. Anyone who would like to have a copy of Adobe Photoshop just incase they dont have one then please contact me @ +971 55 88 00 210 so that I can give you one for FREE! ( Yes you heard that right, FREE! :p )

Alright lets get started.

First of all open up Photoshop, I would suggest that you do it alongside reading this so that you can have a better idea at what your dealing with.

Now since you might have used Photoshop previously and there could have been some changes made to the settings, we have to get them back to default. Its very easy. Just follow these two steps:


  1. As soon as you click on Photoshop, immediately hold down Ctrl+Alt+Shift to reset the default settings.
  2. When prompted, click Yes to confirm that you want to delete the Photoshop settings file and then click close to get your welcome screen.
The Work Area

By default we have 6 sections in the work area:-
  1. Menu Bar
  2. Tool options bar
  3. toolbar
  4. Adobe Bridge button
  5. Palette well
  6. Floating Palettes
It looks like this although different Operating Systems may vary the layout.


Now lets answer the very famous question,
What is the difference between Adobe Photoshop & Adobe Illustrator since both of them deals with images?

Its very simple ;)

There are two types of images, Bitmap & Vector.

Bitmap is dealt with in Photoshop & Vector in Illustrator.

Bitmap & Vector Images

Now I can get so detail about these two words that you might even take an oath never to visit this blog even bymistake in your entire life :P

So I will just show you an image so that you can get to know the difference.


One more image ? :P Here you go ;)


Im sure you got a pretty good idea about what these two are.

In general Bitmap is used for photography and other images and is used most commonly.
Vector is used for designing logos, signatures, digital art etc.

When you zoom both the images maximum then you can see like the above image that the bitmap turns out to become small squares known as pixels but vector is still crystal clear because it is created using points and lines. I will stop here about these two so that you dont get too confused. Just to know we will be dealing with bitmap :)

Color Modes

Different Color Modes

There are 8 color modes in Photoshop:-
  1. Bitmap -  A bitmap image is made up of black or white and nothing in between. A bitmap image is best used for line drawings, signatures, or logos made up of one solid colour
  2. Greyscale - Think black and white photo here. A greyscale image has black, white, and every scale of grey in between (256 of them actually).
  3. Duotone - You choose the two colors to blend, say a black and a red, and photoshop blends the two colors over your image to give you a nice effect (much like a sepia tone but with greater control). A monotone is quite simply one ink and a tritone and quadtone use a mix of three and four colors respectively.
  4. Indexed - You can use a colour range of up to 256 colours to define your image making it a smaller file size, however the quality of your image is severely compensated. Used for emailing and web purposes.
  5. RGB - Red, Green, and Blue. The same color system that makes up viewing an image on a computer monitor (also the same as on a tv). The process of defining your image is to blend the three main colors (Red, Green, and Blue) to achieve the desired color in your fil. It's the image color of choice for photos viewed on screen. It has the widest range of color available for your photoshop image.
  6. CMYK - Cyan, Magenta, Yellow, Black.This process is the same as on a full color printing press, therefore if you are printing your image file, this color mode gives you the most accurate representation of what will be printed.
LAB and MULTICHANNEL will be explained in the future.

Now let us see what the different modes look like.

Bitmap and Greyscale are quite obvious so lets move to Duotone.

Duotone Color Mode

Indexed color mode cannot be showed in an image as an example but dont worry I will explain that eventually :)

Now the difference between RGB & CMYK


Now thats it for the first lesson. I hope it was clear and upto the mark as well as easily understood. :)

If you have and questions please call me at the number provided at any time of the day.

The next lesson we will learn about a new feature in CS4 which was not there in the previous versions known as Tabbed Windows.

Till then, take care and do keep in touch with this blog and forward the link to all those who are interested.

Buhbie ;)

Wednesday, December 1, 2010

Edit No.3

Its time for the edit of the night :)

This is my own work, which took me approximately 4 hours today & I totally dont regret wasting that much time and you ll know that after you see the image and the source file :D

Here you go ...


This is the power of Adobe Photoshop ! ! !

Goodnight people and have a wonderful National Day :D

Apology ...

I am very sorry for the delay in the start of the lessons as I am waiting to get my hands on the course material which is with a friend. You have my word that after the U.A.E. National Day holidays which is by Sunday I will start the first class.

Once again I am very sorry :( 

Tuesday, November 30, 2010

Edit No. 2

Time for the edit of the day !

This is my work ... a quick one to let you all know about, the way I call it - ' The Cinematic Effect '


Have a good night and be prepared by tomorrow for the first Lesson,
'Understanding the Different Color Modes'

:D

Before we Start !

I guess we are ready for the first class :)

Now before we start we need to know some basics and have the software too otherwise there is no point in me just blabbering anything :P 

Basics :- 
  1. You dont need to know anything about Photoshop before you start. :P No I am SERIOUS ! :)
  2. Please be regular. I know I sound stupid but matter of fact you dont want to miss the chance of getting free stuff from me! Yea thats right I will be giving out Adobe Products and the best you can get out of all is Adobe CS5 Master Collection and a lot more so be regular :P 
  3. Feel FREE to call me any time you want incase you have any sort of doubts at any time of the day @ 00 971 55 88 00 210 :) 
  4. Lets get started ;)
And just so that you people can be comfortable with coping up with me, I am going to make sure that I am not going to go through any section of Photoshop which are not required for normal people unless they want to take this seriously and upon request which I will us a more advanced methodology of teaching.

So ultimately what I am trying to say is that I will teach you all everything in the easiest possible way and enough to start editing just like ME ! 

Isn't that all you need !? :D 

Monday, November 29, 2010

Edit No. 1

Alright people, I will be uploading 1 extraordinary edit every night, could be mine or an internet material. This is just to show you people the beauty and capability of what Photoshop can do to an image :)

And dont worry, it is not as complicated as it looks, some of them can be done in just minutes & YOU can also do it once you start learning gradually !

For tonight, this is something called 'The Mental Wave Explosion Effect' (Internet Material)


Brilliant isn't it ? :D

Do not forget people like I said, you can do this :)

Have a good night :)

The Beginning ! - II

Just one more quick post on how I started everything and then we will quickly move on to the lessons. :) Please bare me :P 

After I got my first edit from Harry, the first thing I did was quickly downloaded the Adobe Photoshop CS3 from www.mininova.com ... This website doesn't exist anymore because of certain legal issues but you should try other sites like http://isohunt.com/ or http://thepiratebay.org/ in case you want to get a copy too. I'm sure you people do know how to download torrents but no problem if you're new to this then please visit http://www.wikihow.com/Download-Torrents, it's easy to understand :)

After installing the software, I was blank !!! :P Trust me, so blank that i didn't open it for the next couple of days, because it looked so complicated in the start and now, I never use any of the toolbars because I play the game using shortcuts and my hands move so quickly that you guys wont have a clue whats happening :) and whats the good part, every single person who is eager to learn and will follow up regularly, EVEN YOU GUYS CAN BECOME LIKE OR EVEN BETTER THAN ME! :D

So after a couple of days I started surfing the internet for free tutorials as on how to get started with this freaking complicated crap I had just installed. Then I figured http://www.youtube.com/ helped a lot. They have a lot of free tutorials on how to start working with Photoshop. Then I slowly started with how to change the color of a car, change the color of the hair, change eye color, then moved on to how to swap faces, swap bodies, extract background etc. Eventually I almost learned most of the tools. Talking about tools, frankly speaking if you know the entire set of tools in Photoshop, thats all you need to learn! Remaining is your CREATIVITY ! We will get back to that later on don't worry :) 

So after I learned most of the tools then my Dad noticed my interest and gave me even more support. He told me to join some course but then I told him not now, let me get along properly and then we will think about it. So after a while when I really started building my interest I decided to get certified by Adobe. So I began hunting for the certified Adobe Training Centers in Dubai and just my luck I tell you guys, The only one Adobe Certified Training Center in entire GCC is in Dubai :D ' SitesPower Training Institute' http://www.sitespower.com/ . So I went there during Ramadan time with my Dad and luckily they had an amazing offer. Buy one course and get one course free :D Luck I tell you :P I took two courses and got two free. One course was charged @ AED 2500, so for AED 5000 I got 4 courses. Adobe Photoshop, Illustrator, Flash & Dreamweaver. 

So after I completed my course I enrolled for the ACE exam only for Photoshop which cost me 140$ per paper. I passed my paper and got my certificate.

Thats it for today people, I dont want to bore you people so tomorrow we will get started with the first lesson : )

to be continued . . . 

The Beginning !

Ok, first of all I would like let you all know that this is no professional teaching class. I will be explaining myself each and everything so that it will be easy for you all to understand rather than just copy pasting all complicated stuff from the internet which doesn't make sense at all. 

Now, I'll let you know how I came into this field, though I am not a full time designer I hope you people might have seen a couple of works on my FACEBOOK profile, so in fact I am a part time designer. Again, I don't design or edit for money, actually not that I don't or not that I haven't been offered but its just that I never did for some strange reason which I myself don't know :P. 

Frankly speaking it all started from one person, a good friend of mine who used to edit a couple of pictures using Photoshop and upload on FB. At that time he was very well known for all of his edits. Then I badly wanted one too, you know the excitement of being in a good edit :P ! In fact even a small reason as of to why you are here to learn yourself :D so then I asked him for one too and he never says no to anybody, I mean he is a total down to earth person so in just a day or two he did my edit and uploaded it !!! At that point of time I was all crazy about that one edit of mine and I myself have no clue how much I appreciated and thanked him for that. Below is the one work that got me started into the total different world of Graphic Designing & a picture of the ONE person who played a very important role in my life and about whom I have been talking all about ! 


My First Work from Scratch :) 


The one and only - DJ Harry Joseph :D 

to be continued  . . .